
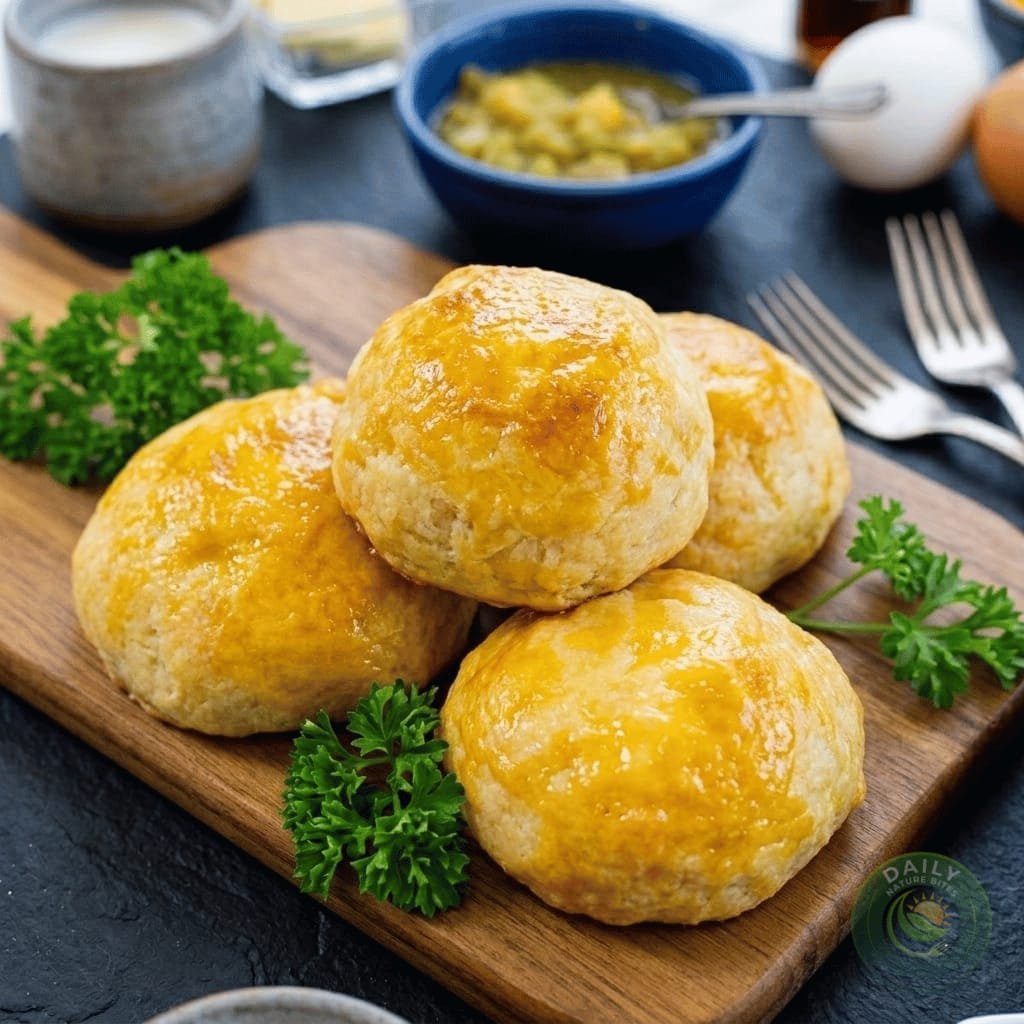
Air Fryer Breakfast Bombs with Bacon, Egg & Cheese

Flaky biscuit dough wrapped around soft scrambled eggs, crisp bacon, melted cheddar, and mild green chiles — finished with a sweet maple-butter glaze.
These air fryer breakfast bombs turn refrigerated flaky biscuit dough into a handheld breakfast filled with soft scrambled eggs, crisp bacon, melted cheddar, and mild green chiles. A light maple-butter coating gives the biscuit exterior a subtle sweet finish that works especially well with the salty bacon and cheese.
The preparation is straightforward: cook the bacon, make the eggs, combine the filling, wrap it in biscuit dough, and air fry until the outside is deeply golden. The eggs are intentionally cooked only until barely set before filling the dough because they continue cooking during the final air-fryer stage.
The recipe makes 16 small breakfast bombs from one eight-count can of flaky biscuits. They are best served warm, when the biscuit exterior is crisp and the cheese-filled center is soft and savory.
Why You’ll Like This Recipe
- Handheld and convenient: Each breakfast bomb is individually portioned and easy to serve.
- Crisp biscuit exterior: Air frying gives the dough a golden, lightly crisp surface.
- Savory-sweet combination: Bacon, cheddar, and eggs are balanced by a thin maple-butter glaze.
- Flexible filling: The basic technique works with several cooked meats, cheeses, and vegetables.
- Make-ahead friendly: The assembled bombs can be refrigerated overnight, and cooked leftovers can be refrigerated or frozen.
Quick Recipe Overview
| Prep Time | 9 minutes |
| Cook Time | 19 minutes |
| Total Time | 28 minutes |
| Yield | 16 breakfast bombs |
| Category | Breakfast |
| Method | Air fryer |
| Difficulty | Easy |
Ingredients
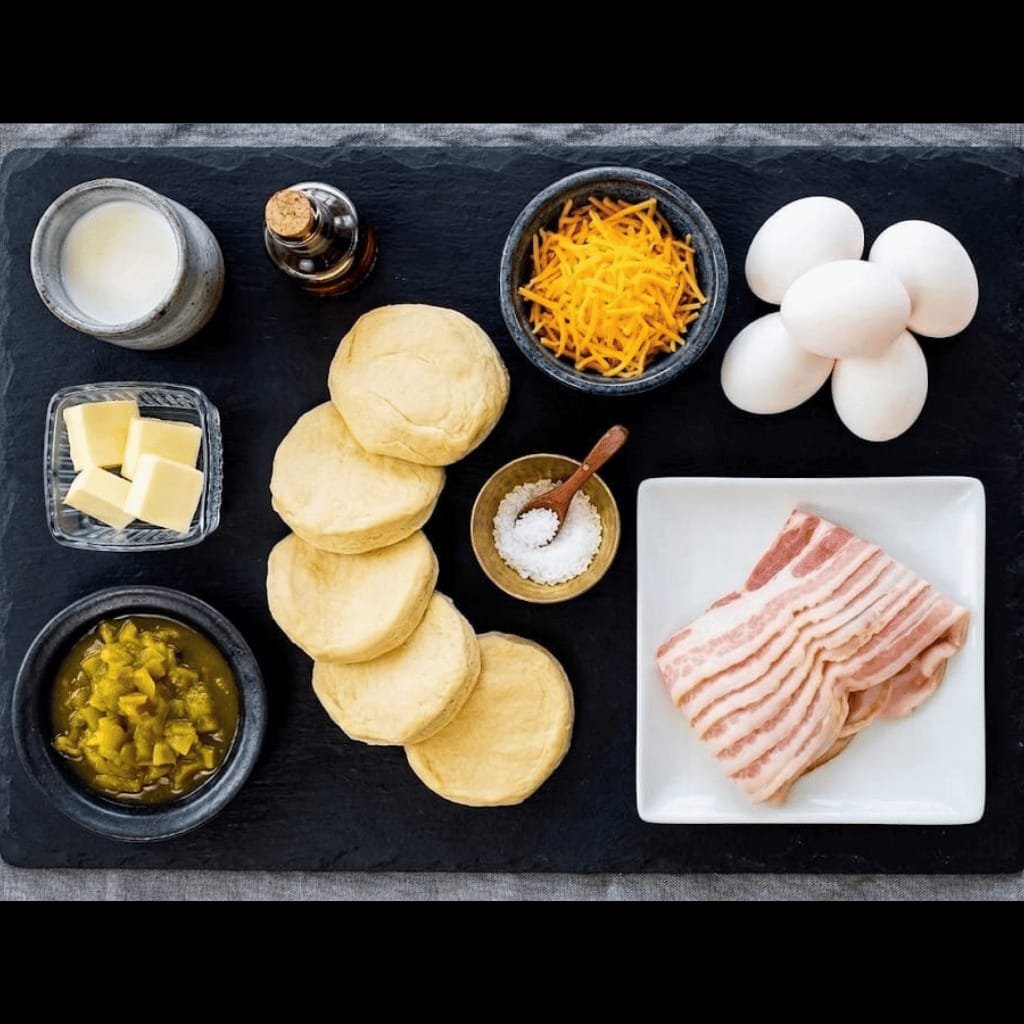
- 6 slices bacon (186g)
- 4 large eggs (approx. 236g)
- 1 tablespoon milk (approx. 21g)
- 1/2 teaspoon salt (approx. 9g)
- 1 cup shredded cheddar cheese (131g)
- 2 tablespoons diced green chiles (46g)
- 1 can (8-count) refrigerated flaky biscuit dough (476g)
- 4 tablespoons butter, melted (72g)
- 1 tablespoon maple syrup (36g)
Ingredient Notes
Bacon
Cook the bacon until fully crisp rather than merely browned. Crisp bacon is easier to crumble and distributes more evenly throughout the filling.
Cheddar Cheese
Freshly shredded cheddar melts smoothly into the warm egg mixture. Pre-shredded cheese can also be used, but it may not melt quite as smoothly because of the ingredients used to prevent the shreds from clumping.
Flaky Biscuit Dough
Use refrigerated flaky biscuit dough and separate each biscuit along its natural layers. An eight-count can provides 16 dough portions when each biscuit is divided into two layers.
Keep the dough cold until you’re ready to assemble the bombs. Cold biscuit dough is easier to flatten, fill, and seal.
Green Chiles
Diced canned green chiles provide mild heat and a little extra flavor. They can be omitted for a milder version or replaced with finely diced jalapeño if more heat is desired.
Maple Butter
The combination of melted butter and maple syrup creates the finishing glaze. If you prefer a completely savory breakfast, use melted butter alone.
Equipment
- Air fryer
- Medium mixing bowl
- Nonstick skillet
- Silicone spatula
- Small bowl for maple butter
- Paper towels
- Spoon
Step-by-Step Instructions
Cook the Bacon
Arrange the bacon in a single layer in the air fryer basket.
Cook at 400°F (200°C) for about 12 minutes, watching closely toward the end because bacon thickness and air-fryer models can affect the cooking time.
The bacon should be fully crisp and golden. Transfer it to a paper towel-lined plate and let it cool enough to handle.
Crumble the bacon into small pieces.
Carefully remove the accumulated bacon grease from the air fryer basket and wipe the basket clean before continuing.
Make the Scrambled Eggs
While the bacon cooks, crack the eggs into a medium bowl.
Add the milk and whisk until the mixture is evenly combined and slightly frothy.
Lightly coat a nonstick skillet with butter or oil and heat it over low heat. Pour in the eggs and stir gently with a silicone spatula.
Cook slowly until the eggs are set but still slightly glossy and soft. Do not cook them until completely dry. They will continue cooking after they are enclosed in the biscuit dough.
Season with the salt and remove the skillet from the heat.

Combine the Filling
Add the crumbled bacon, shredded cheddar, and diced green chiles to the warm scrambled eggs.
Stir gently until the ingredients are evenly distributed.
Let the mixture cool for about 9 minutes before assembling. The filling should remain warm but should not be piping hot. A short cooling period also makes the biscuit dough easier to handle.

Divide and Flatten the Biscuit Dough
Open the biscuit dough and separate each biscuit into two layers along the natural seam.
You should now have 16 pieces.
Work with one piece at a time. Gently flatten it with your fingers into a slightly larger round, keeping the center thick enough to contain the filling.
Fill and Seal the Breakfast Bombs
Place a generous spoonful of the egg mixture in the center of the flattened dough.
Bring the edges upward around the filling and pinch them firmly together.
Roll the sealed dough gently between your palms to form a smooth ball. Check that there are no visible gaps or weak seams.
Place each completed bomb seam-side down while you assemble the remaining pieces.
Avoid overfilling. Too much filling can make the dough difficult to close and increases the chance of the filling escaping during cooking.
Make the Maple Butter
In a small bowl, combine the 4 tablespoons melted butter with the 1 tablespoon maple syrup.
Stir until evenly blended.

🌿 Save This Recipe from DailyNatureBites
Enter your email below & we’ll send it straight to your inbox + you’ll subscribe for all the latest recipes!
Air Fry
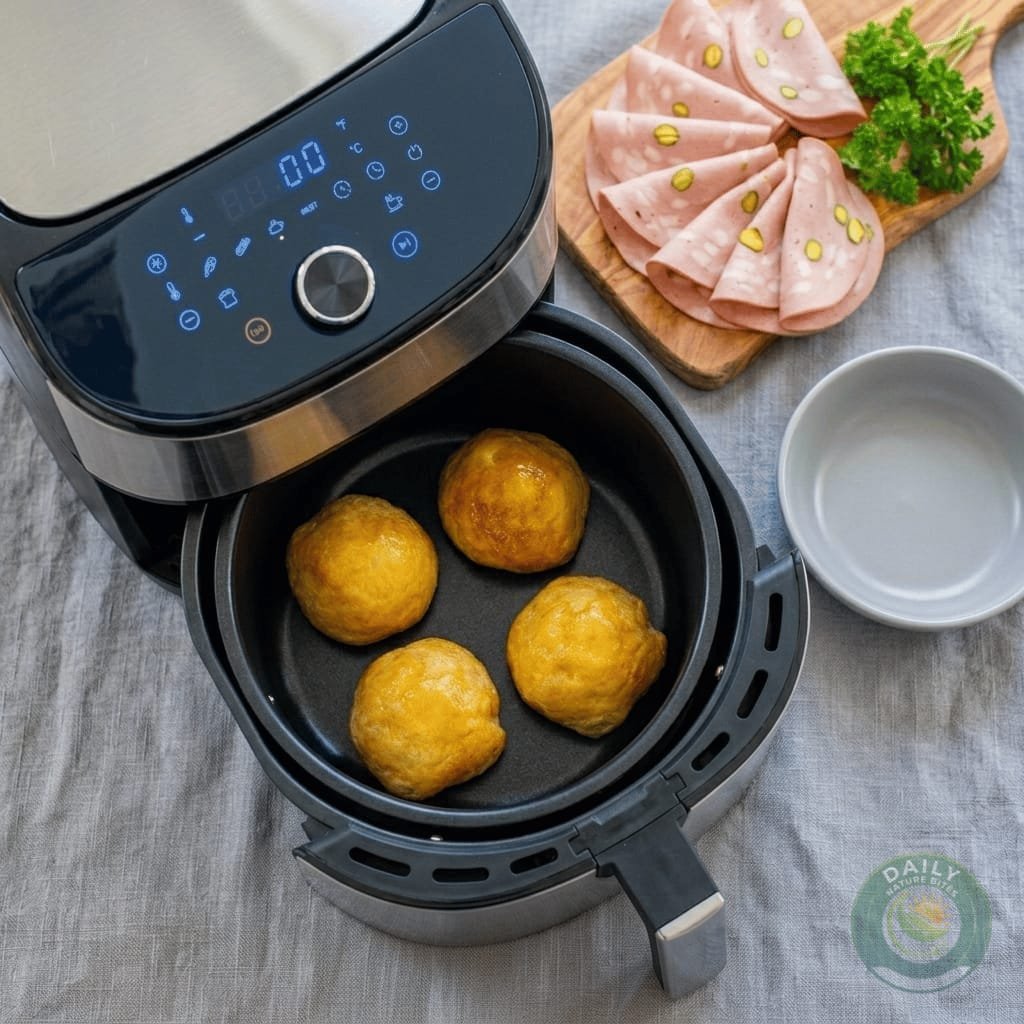
Arrange the breakfast bombs in the air fryer basket in a single layer, leaving about 1 inch of space between them.
Do not overcrowd the basket. If all 16 cannot fit comfortably in one layer, cook them in batches.
Brush the tops generously with the maple-butter mixture.
Air fry at 350°F (175°C) for 9–10 minutes.
Look for a deep golden-brown exterior and biscuit dough that is cooked through. If you use a food thermometer to verify the filling, the center should reach at least 165°F (74°C).
Because air fryers vary in power and airflow, begin checking near the lower end of the cooking range.
Rest Before Serving
Remove the breakfast bombs from the air fryer and let them rest for 6–7 minutes.
The filling can be very hot immediately after cooking, and the short rest also allows the interior to settle.
Serve warm.
How to Tell They’re Done
The breakfast bombs are ready when:
- The biscuit exterior is deep golden brown.
- The dough looks fully cooked rather than pale or raw around the seams.
- The surface feels lightly crisp.
- The filling is hot throughout.
- The cheese is melted into the egg mixture.
- A thermometer inserted into the center reads at least 165°F (74°C).
For food safety, use the internal-temperature check when there is any doubt about whether the egg-filled center has cooked sufficiently.
Cooking Tips
- Keep the biscuit dough cold until assembly so it stays easier to work with.
- Cook the bacon until genuinely crisp; soft bacon can make the filling greasy and harder to distribute.
- Leave the scrambled eggs slightly soft before filling because they receive additional cooking in the air fryer.
- Allow the filling to cool briefly before wrapping it in the dough.
- Seal the biscuit seams firmly and check each ball for gaps.
- Leave space around each breakfast bomb so hot air can circulate.
- Cook in batches rather than overcrowding the basket.
- If you want a more savory finish, brush with melted butter instead of maple butter.
- For an extra cheesy surface, a small amount of additional cheddar can be added before air frying.
Troubleshooting
| Problem | Solution |
|---|---|
| The filling leaks out | Likely cause: The dough was overfilled or the seams were not sealed tightly. Solution: Use a smaller amount of filling and pinch the edges firmly together. Roll the dough into a smooth ball and make sure there are no visible openings. |
| The biscuit exterior is brown but the center isn’t done | Likely cause: The bombs may be too large, too tightly packed, or your air fryer may cook more aggressively. Solution: Check the center with a thermometer. The filling should reach at least 165°F (74°C). Keep the bombs properly spaced so they cook evenly. |
| The biscuit dough is difficult to seal | Likely cause: The dough has warmed and become soft or sticky. Solution: Work with the dough in small batches and keep the remaining pieces refrigerated until needed. |
| The breakfast bombs aren’t crisp enough | Likely cause: Overcrowding or excess moisture around the dough. Solution: Cook in a single layer with adequate space between the pieces. Avoid packing the basket tightly. |
| The eggs are dry | Likely cause: The eggs were fully cooked before being wrapped. Solution: Remove them from the skillet while they are set but still slightly glossy. They will continue cooking inside the biscuit during air frying. |
| The bacon makes the filling greasy | Likely cause: The bacon was not drained after cooking. Solution: Transfer the cooked bacon to paper towels before crumbling it into the filling. |
Substitutions
Bacon → Cooked breakfast sausage
Use fully cooked, crumbled breakfast sausage. It creates a more sausage-forward flavor and may be slightly less crisp than bacon.
Bacon → Diced ham
Cooked diced ham provides a milder, less smoky filling. Use small pieces so they distribute evenly.
Cheddar → Another melting cheese
A similar melting cheese can be used, although the flavor and appearance will change. A mild cheese creates a gentler filling, while a stronger cheese gives the breakfast bombs a more pronounced flavor.
Green chiles → Jalapeño
Finely diced jalapeño provides more noticeable heat. Remove the seeds and membranes for a milder result.
Maple syrup → Butter
Replace the maple syrup with melted butter if you prefer a fully savory exterior.
Canned biscuit dough → Homemade biscuit dough
Homemade dough can work if it is rolled to a similar thickness and divided into 16 portions. Cooking time may vary depending on the dough.
Variations
Spicy Breakfast Bombs
Replace the mild green chiles with finely diced jalapeño or add a small amount of crushed red pepper flakes.
Sausage, Egg & Cheese
Replace the bacon with cooked, crumbled breakfast sausage.
Ham & Cheddar
Use finely diced cooked ham instead of bacon for a milder filling.
Vegetarian Breakfast Bombs
Omit the bacon and use cooked vegetables such as sautéed mushrooms, spinach, and bell peppers. Cook the vegetables first so excess moisture does not make the biscuit dough difficult to seal.
Make-Ahead
The breakfast bombs can be assembled the night before.
Arrange the sealed, unbaked bombs on a baking sheet, cover them tightly, and refrigerate overnight.
In the morning, brush them with the maple butter and air fry as directed. Because the assembled dough will be cold from refrigeration, they may require an additional minute or two to cook through.
Storage
Allow cooked breakfast bombs to cool completely before transferring them to an airtight container.
- Refrigerator: Store for up to 3 days.
- Freezer: Freeze in a freezer-safe bag or container for up to 2 months.
Freezing can slightly change the texture of the biscuit dough, but reheating in the air fryer helps restore some of its crispness.
Reheating
For refrigerated breakfast bombs, air fry at 350°F (175°C) for 6–7 minutes, or until heated through.
For frozen breakfast bombs, add approximately 6–7 additional minutes and check that the center is thoroughly hot.
The microwave is convenient, but it tends to soften the biscuit exterior and can make the dough chewy. The air fryer is preferable when you want to bring back some of the original crisp texture.
Serving Suggestions
Serve these breakfast bombs warm with:
- Fresh fruit
- Orange juice
- Coffee
- Additional maple syrup
- A simple fruit salad
Because the bombs already contain eggs, bacon, cheese, and biscuit dough, a fresh fruit side provides a lighter contrast.
Recipe Notes
- One eight-count can of flaky biscuit dough is divided into 16 dough portions.
- Keep the dough cold while assembling.
- Do not overfill the biscuit pieces.
- The eggs should be slightly underdone before assembly because they continue cooking in the air fryer.
- Air fryer cooking times can vary with basket size, airflow, and appliance power.
- Cook in batches if necessary rather than overcrowding the basket.
- Verify the center reaches 165°F (74°C) when using a thermometer to check doneness.
FAQ
Can I make these breakfast bombs ahead of time?
Yes. Assemble them the night before, cover them tightly, and refrigerate. Brush with maple butter immediately before air frying. They may need an additional minute or two because they start cold.
What air fryer temperature should I use for stuffed biscuit dough?
The final cooking temperature is 350°F (175°C). This gives the biscuit dough time to cook through while allowing the outside to become golden without relying on a very high temperature.
Can I use homemade biscuit dough?
Yes. Divide the dough into 16 portions and roll or flatten them to a similar thickness to the refrigerated biscuit dough. The cooking time may need adjustment depending on the dough.
How do I stop the filling from leaking?
Avoid overfilling each dough piece and pinch the seams firmly. Rolling the filled dough into a smooth ball helps create an even seal.
Can I leave out the green chiles?
Yes. Omitting them gives you a milder egg, bacon, and cheese filling.
Can I replace the bacon?
Yes. Cooked breakfast sausage, diced ham, or another suitable cooked meat can replace it. The flavor and texture will change depending on the substitute.
Can I freeze the breakfast bombs?
Yes. Once cooled, place them in a freezer-safe bag or container and freeze for up to about two months. Reheat them in the air fryer for a better exterior texture.
Why are my eggs dry?
The scrambled eggs may have been cooked too far before being wrapped. Remove them from the skillet while they are set but still slightly glossy so they can finish cooking inside the biscuit.

Serve warm with fresh fruit and coffee for the perfect start to your day.
