
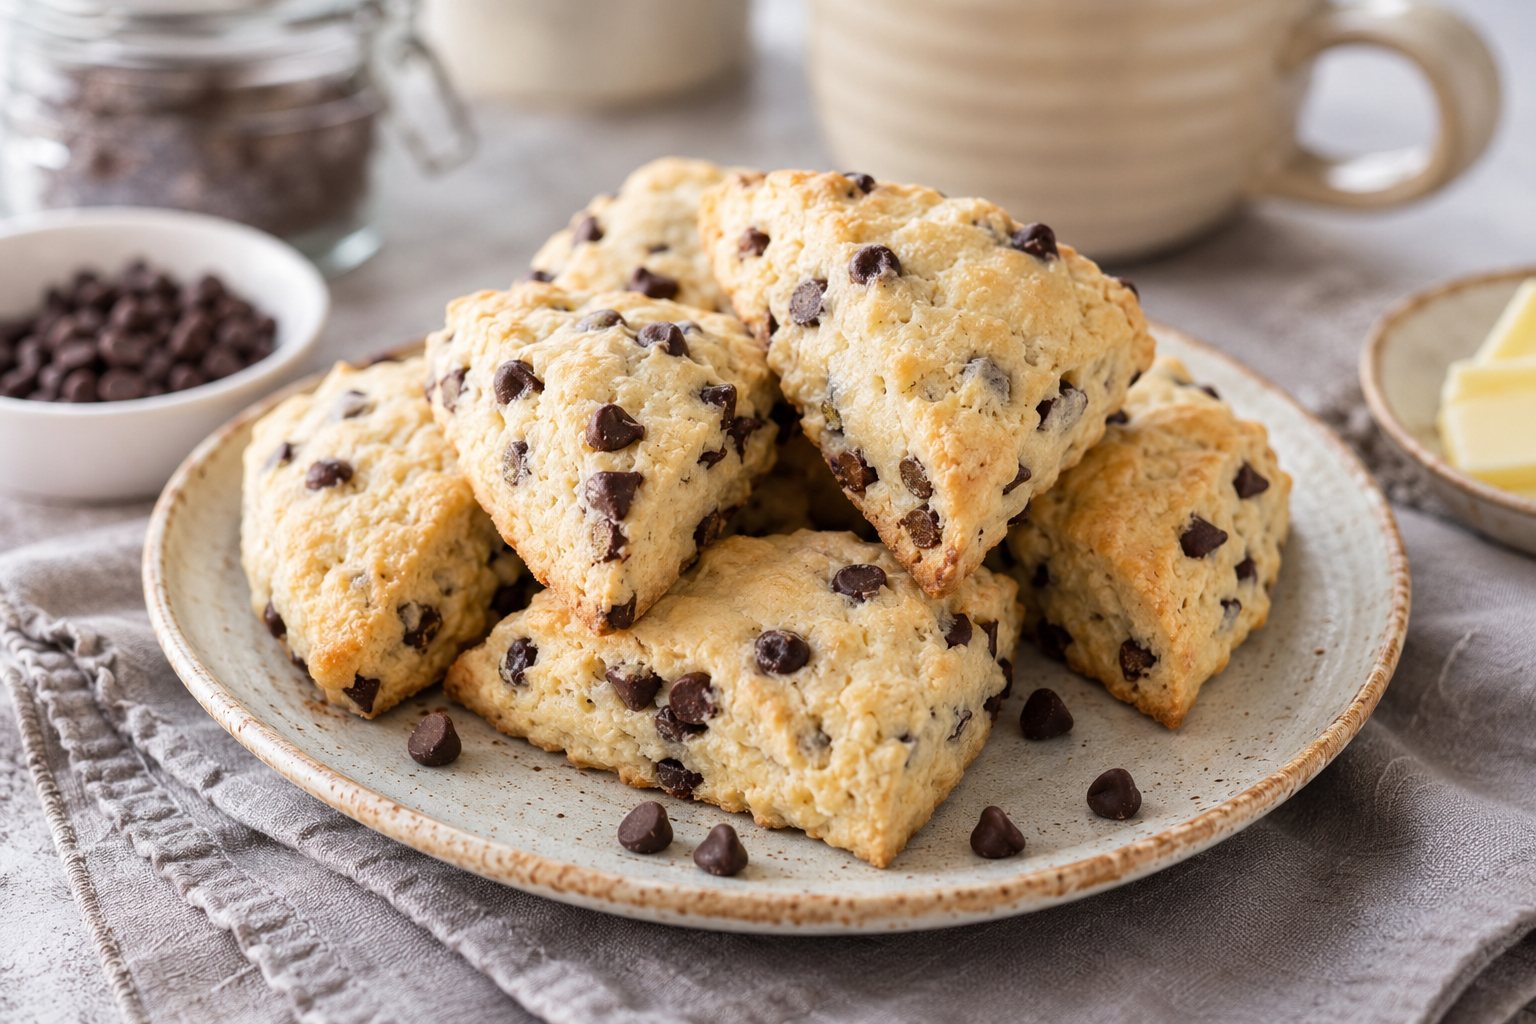
Easy 20-Minute Air Fryer Scones with Chocolate Chips

Tender cream-based scones studded with dark chocolate chips, baked in the air fryer until lightly golden with soft centers — no oven required.
These air fryer chocolate chip scones take a simple cream-based dough and turn it into tender, lightly crisp scones without heating the oven. Cold whipping cream keeps the dough rich and soft, while chocolate chips add pockets of sweetness throughout.
The important part is not to overwork the dough. Once the cream has been incorporated, handle the mixture just enough to bring it together. A short air-fryer bake then gives the scones lightly golden edges while the centers remain soft.
The recipe produces 24 small scones from one batch of dough. Because most basket-style air fryers require several batches, the unbaked portions can be kept chilled while earlier batches cook.
Why This Method Works
- No butter to cut in: The cream supplies the moisture and richness, so there is no need to work butter into the flour extensively.
- Gentle handling: A few light folds are enough; prolonged kneading can make the scones dense.
- Moderate temperature: Keeping the scones at 330°F (165°C) gives the centers time to cook before the tops become excessively dark.
- Air circulation: Leaving space between pieces allows the circulating heat to brown each scone evenly.
- Freezer-friendly: Unbaked wedges can be frozen for up to 3 months and cooked directly from frozen.
Quick Recipe Overview
| Prep Time | 13 minutes |
| Cook Time | 10 minutes per batch |
| Total Time | 20 minutes |
| Yield | 24 scones |
| Category | Breakfast, Dessert, Snack |
| Method | Air fryer |
| Difficulty | Easy |
Ingredients
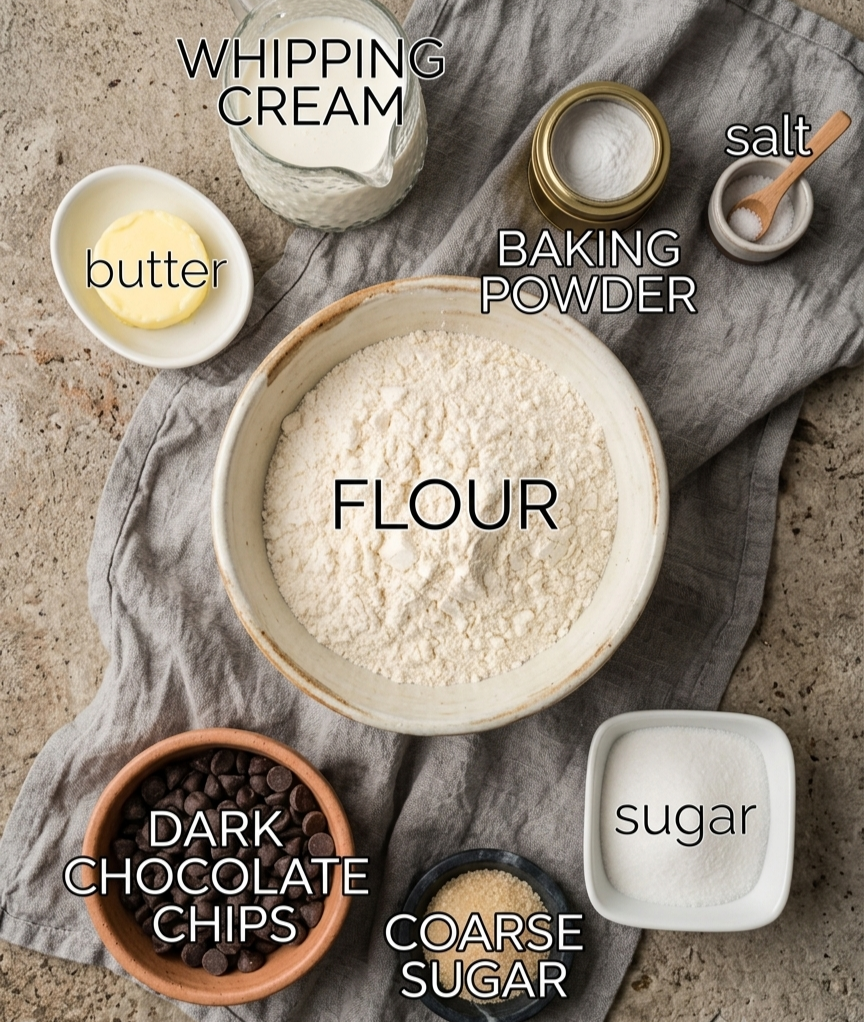
- 3 ¼ cups all-purpose flour (approx. 395g)
- ½ cup granulated sugar (approx. 105g)
- 1 tablespoon + 1 teaspoon baking powder (approx. 21g)
- ¼ teaspoon salt (approx. 6g)
- 2 cups dark chocolate chips (approx. 345g)
- 2 cups cold whipping cream (approx. 485g)
- 2 tablespoons butter, melted (approx. 33g)
- Coarse sugar, for sprinkling
Ingredient Notes
All-Purpose Flour
Spoon the flour into the measuring cup and level it rather than packing it down. Packed flour can make the dough heavier than intended.
Cold Whipping Cream
Keep the cream refrigerated until you are ready to mix the dough. Cold cream helps keep the dough cool, makes the mixture easier to handle, and reduces the temptation to overwork it while bringing it together.
Dark Chocolate Chips
Dark chocolate gives a stronger contrast to the sweet dough. Semi-sweet or milk chocolate chips can also be used without changing the other quantities. Mini chocolate chips distribute more evenly in every bite.
Coarse Sugar
Coarse sugar adds a delicate crunchy finish to the tops. The melted butter helps it adhere while also encouraging light browning on the surface.
Equipment
- Air fryer
- Large mixing bowl
- Wooden spoon or sturdy spatula
- Lightly floured work surface
- Pastry brush
- Cooling rack
Before You Start
Preheat the air fryer to 330°F (165°C) for about 6 minutes. Because the dough produces 24 small scones, most basket-style air fryers will require several batches. Do not try to fit the entire batch into the basket at once. A crowded basket restricts airflow and can leave the scones pale or unevenly cooked.
Step-by-Step Instructions
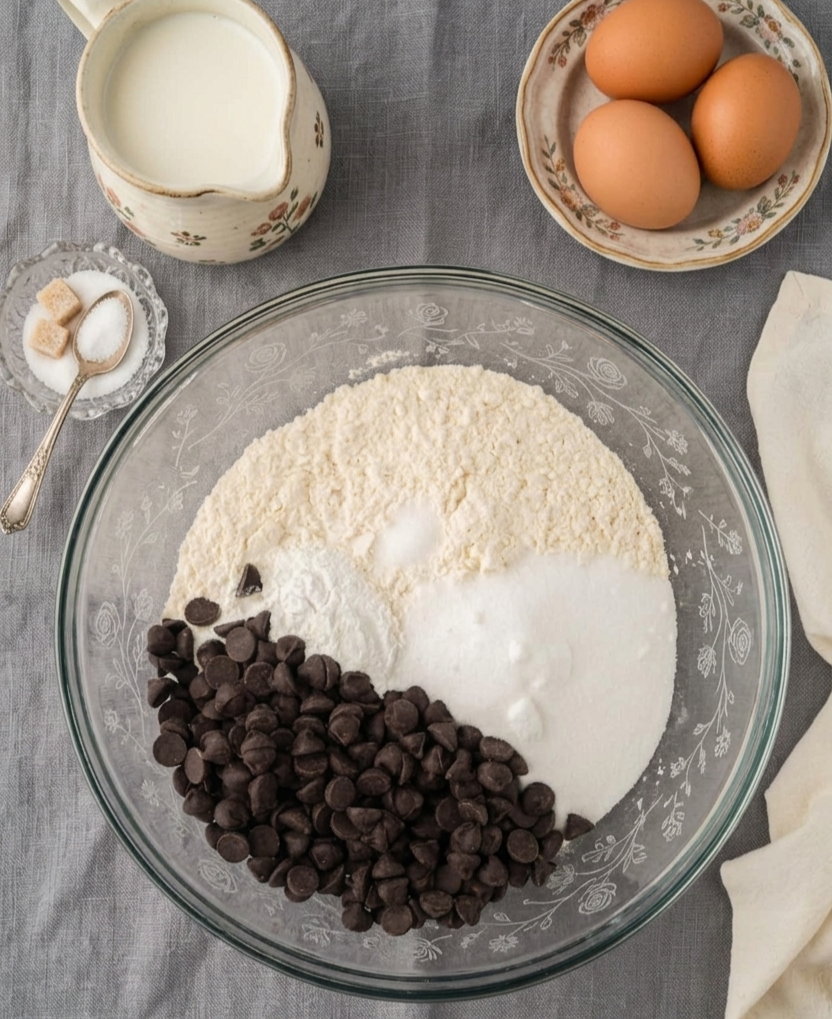
Combine the Dry Ingredients
Add the flour, sugar, baking powder, salt, and chocolate chips to a large bowl.
Stir until the baking powder and salt are distributed throughout the flour and the chocolate chips are evenly dispersed.
Adding the chocolate before the cream also helps distribute the chips without needing to mix the dough aggressively later.
Add the Cold Cream
Pour the cold whipping cream into the dry mixture.
Use a wooden spoon or sturdy spatula to stir until the flour is moistened and the mixture begins to form a rough dough. Stop as soon as there are no large pockets of dry flour.
The mixture may look somewhat shaggy at this stage. That is fine. It should not be kneaded into a smooth bread-like dough.
Bring the Dough Together Gently
Lightly flour your work surface and turn the dough out onto it.
Use your hands to gently bring the mixture together. A few light folds are enough to create a cohesive dough.
If you keep kneading until the dough becomes completely smooth, the finished scones are more likely to lose some of their tender texture.
Divide and Shape
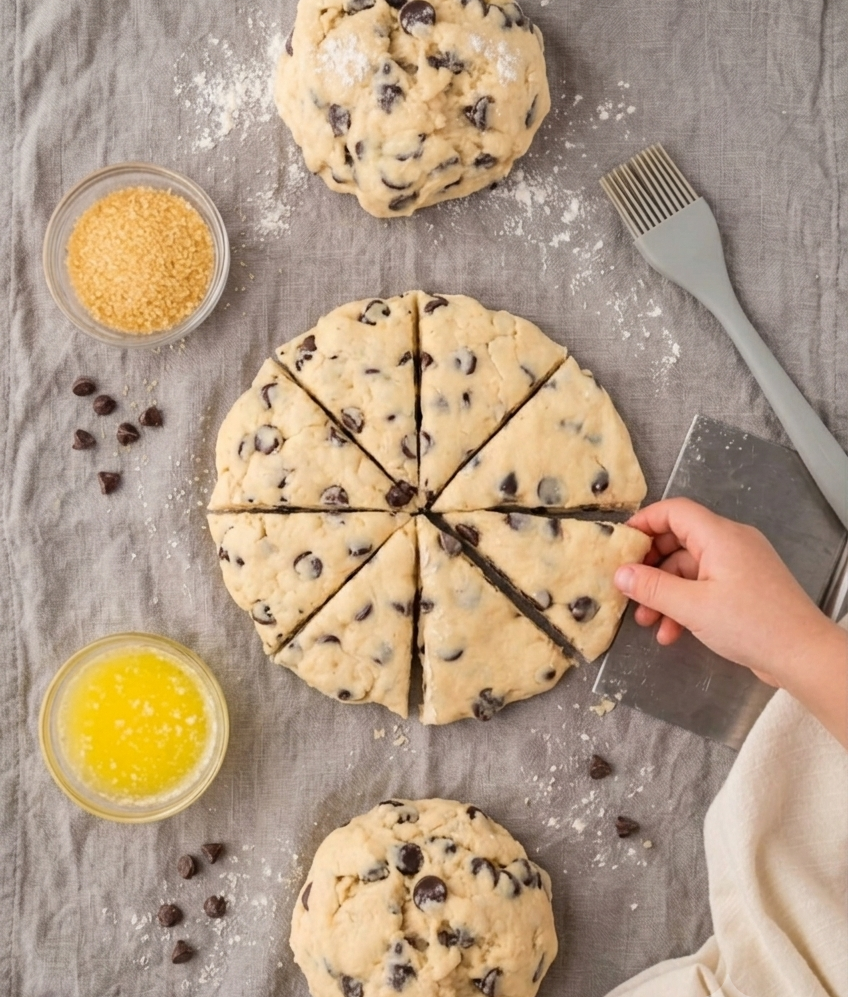
Divide the dough into 3 equal portions.
Shape each portion into a ball, then flatten it with your hands into a circle approximately 7 inches wide.
Cut each circle into 8 wedges, giving you 24 scones in total.
Try to keep the wedges reasonably similar in thickness. Uneven pieces will finish at different times.
Add the Topping
Brush the tops lightly with the melted butter.
Sprinkle each piece with coarse sugar. The butter helps the sugar adhere while also encouraging light browning on the surface.
Air Fry in Batches
Arrange the scones in a single layer, leaving visible space between them.
Air fry at 330°F (165°C) for about 10 minutes.
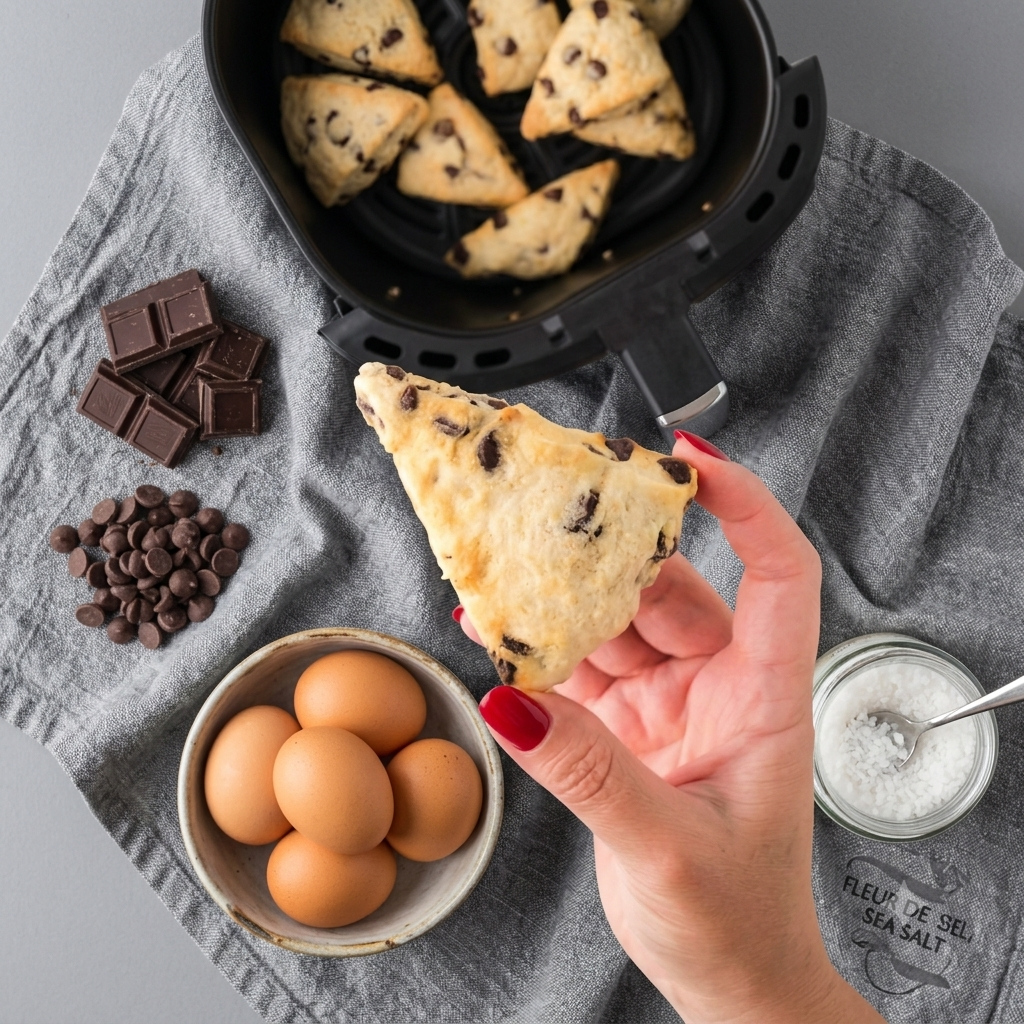
The finished scones should have lightly golden spots around the tops and edges. They should not be deeply browned.
Because air fryers differ in heating power and basket design, begin checking near the 10-minute mark. If the centers still look wet or doughy, continue cooking briefly and check again.
Let Them Rest
Transfer the cooked scones to a cooling rack and allow them to rest for at least 8 minutes.
The interior continues to settle as the scones cool. Cutting or eating them immediately can make the center seem softer and less structured than it will be after a short rest.
💡 Pro Tips
- Do not overwork the dough. A few gentle folds are enough; prolonged kneading makes the scones dense.
- Leave space between pieces. Air needs to circulate around each scone for even browning.
- Color alone is not enough. Look for light golden patches on the tops and edges, a set surface, and a firm exterior with a soft center.
- Work in batches. Most basket-style air fryers cannot fit all 24 scones at once.
- Keep unbaked dough chilled. If your air fryer has a small basket, prepare the dough and keep the unbaked portions chilled while earlier batches cook.
How to Tell When Air Fryer Scones Are Done
Color alone is not enough. Look for:
- Light golden patches on the tops and edges.
- A surface that looks set rather than wet.
- A firm exterior with a soft center.
- No obvious raw dough in the middle when one is opened.
Avoid waiting for a deep golden-brown crust. At that point, the exterior can become dry while the center is still finishing.
Chocolate Options
Dark chocolate chips are a good choice because their bitterness balances the sweet dough. You can also use:
- Semi-sweet chocolate chips for a more moderate sweetness.
- Milk chocolate chips for a sweeter, softer chocolate flavor.
- Mini chocolate chips for more evenly distributed chocolate in every bite.
- A mixture of dark and semi-sweet chips for more variation.
These changes do not require adjusting the dough quantities.
Troubleshooting
| Problem | Solution |
|---|---|
| The scones are too dry | Likely cause: The flour was packed into the measuring cup, or the dough was overworked. Solution: Measure flour more carefully and mix only until the cream is incorporated. Prevention: Keep the dough slightly rough rather than kneading it smooth. |
| The outside is browned but the center is undercooked | Likely cause: The air fryer is running hotter than expected or the scones are thicker than intended. Solution: Lower the temperature and allow the centers additional cooking time rather than increasing the heat. Prevention: Keep the pieces close to the intended thickness and avoid using a higher temperature simply to shorten the cooking time. |
| The scones aren’t browning evenly | Likely cause: Pieces are too close together or the air circulation in the basket is restricted. Solution: Cook fewer scones per batch and leave clear gaps between them. Prevention: Always use a single layer. |
| The dough feels difficult to handle | Likely cause: The cream has not been distributed evenly or the dough is being worked too much. Solution: Use lightly floured hands and gently press the mixture together rather than kneading it. |
| The scones are too pale | Likely cause: Some air fryers brown less aggressively, especially when the basket is crowded. Solution: Give them a little additional cooking time while watching the tops closely. Prevention: Leave space around each piece and avoid stacking. |
Can You Freeze These Scones?
Yes. The unbaked scones can be prepared ahead and frozen.
Arrange the cut, unbaked wedges on a baking sheet in a single layer and freeze them for about 1 hour, or until firm. Transfer them to a freezer-safe bag or container and keep them frozen for up to 3 months.
When you are ready to bake them, there is no need to thaw first. Preheat the air fryer to 330°F (165°C) and cook the frozen scones for approximately 11 minutes, checking for lightly golden edges and a cooked center. Frozen dough can vary slightly in thickness, so use the visual doneness cues as your final guide.
Storage and Reheating
Store cooled scones in a covered container at room temperature for up to 2 days.
For a freshly baked texture, reheat an individual scone in the air fryer for about 4 minutes. Watch it closely so the outside does not become overly crisp.
For longer storage, freezing the unbaked wedges is preferable to keeping finished scones frozen for an extended period.
Serving Ideas
These scones are substantial enough to serve without anything alongside them, but several simple additions work well. Try them with:
- Butter while still slightly warm.
- A quick powdered-sugar-and-milk glaze.
- Fruit preserves or jam.
- Fresh berries or sliced fruit.
- Coffee, tea, or cold milk.
For brunch, arrange the scones with fresh fruit and a small bowl of jam for an easy self-serve spread.
Frequently Asked Questions
Can I use milk instead of whipping cream?
Milk is not a direct substitute in this recipe. Whipping cream contributes considerably more fat and richness, so replacing it with milk would change the dough’s texture and moisture balance.
Why does the cream need to be cold?
Cold cream helps keep the dough cool and makes the mixture easier to handle. It also reduces the temptation to overwork the dough while bringing it together.
How many scones does this recipe make?
Three 7-inch dough circles are cut into eight wedges each, producing 24 scones.
Do I need to turn the scones halfway through cooking?
The original method does not require turning them. Arrange them with space around each piece and allow the circulating air to cook the scones evenly.
Can I use milk chocolate chips?
Yes. Milk chocolate produces a sweeter result than dark chocolate, but it works without changing the other ingredient quantities.
Why shouldn’t I cook them at a very high temperature?
A higher temperature can brown the exterior before the thicker center has finished cooking. The moderate 330°F setting gives the middle more time to set.
Can I cook the scones directly from frozen?
Yes. Frozen, unbaked scones can go directly into a preheated 330°F air fryer. Allow approximately 11 minutes and check the center before removing them.
Save This Recipe
from DailyNatureBites
Enter your email below & we’ll send it straight to your inbox + you’ll subscribe for all the latest recipes!
